Innovative technique posted by Paul Smith
on YouTube that uses common materials
I have gotten dozens of emails from folks who don’t have two hoses they can use to drill a well. They frequently point out to me that if they had that much water available, they wouldn’t need a well. OK, fair enough. If you don’t have much water available for drilling, use a mud pump if you possibly can. It works great. Seriously, a mud pump is a game changer. Nonetheless, if a mud pump is not an option for you, read on…
I ran across this video on YouTube. Paul Smith has an excellent technique that he has been kind enought to share. It only requires one hose. It involves using an air and water mixture to bring the cuttings up.
He pumps both water and air down to the bottom of the hole. The water and air mixture then bring the cuttings to the top inside the drillpipe.
Take a look at the video below:
June 2013 – After I posted this technique I heard from Lee on the Oregon coast. As I have indicated in other places on the site, one of the most interesting things about maintaining this site is the input I receive from users. Folks try the techniques posted on the site and frequently figure out a better way of doing what is shown. Unfortunately, he is no longer answering emails, but here is his technique:
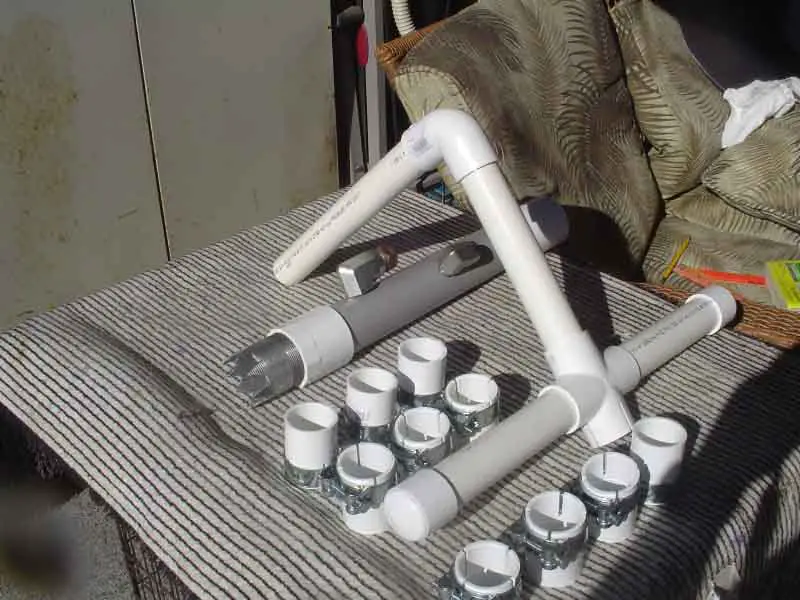
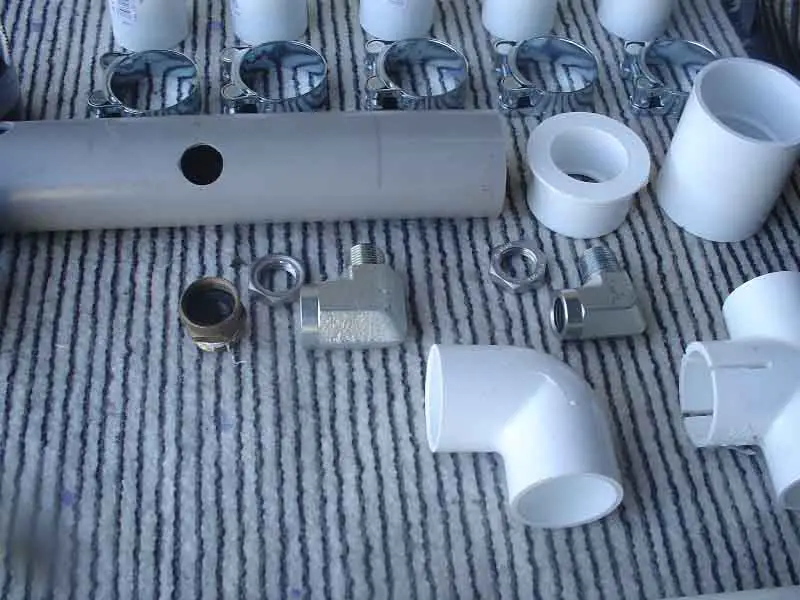
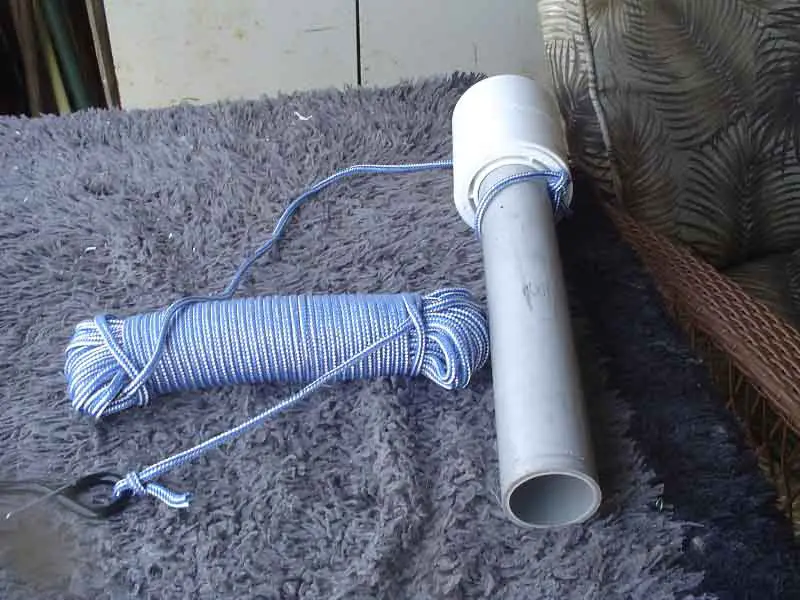
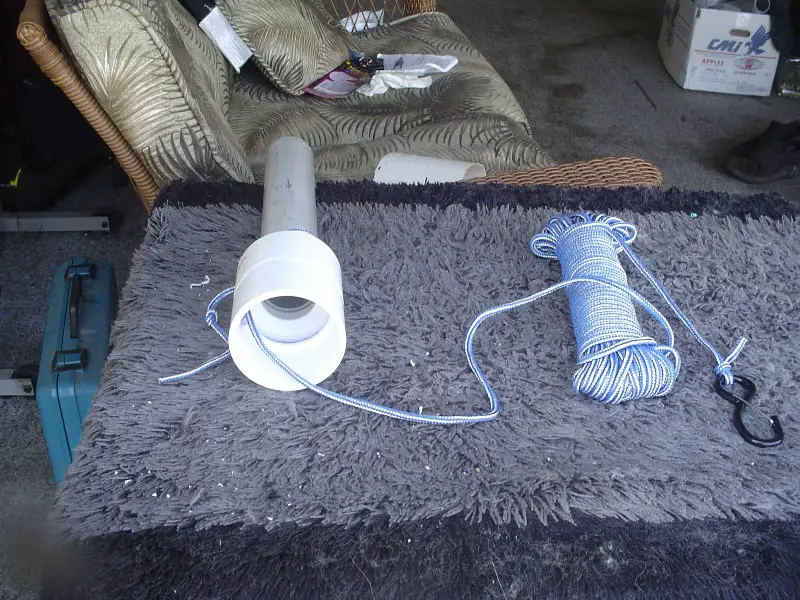
Through trial and error, Lee has developed improved hardware for one hose drilling. He is willing to put together a kit and sell it to anyone who wants to try it. Take a look at the fittings that he has developed.
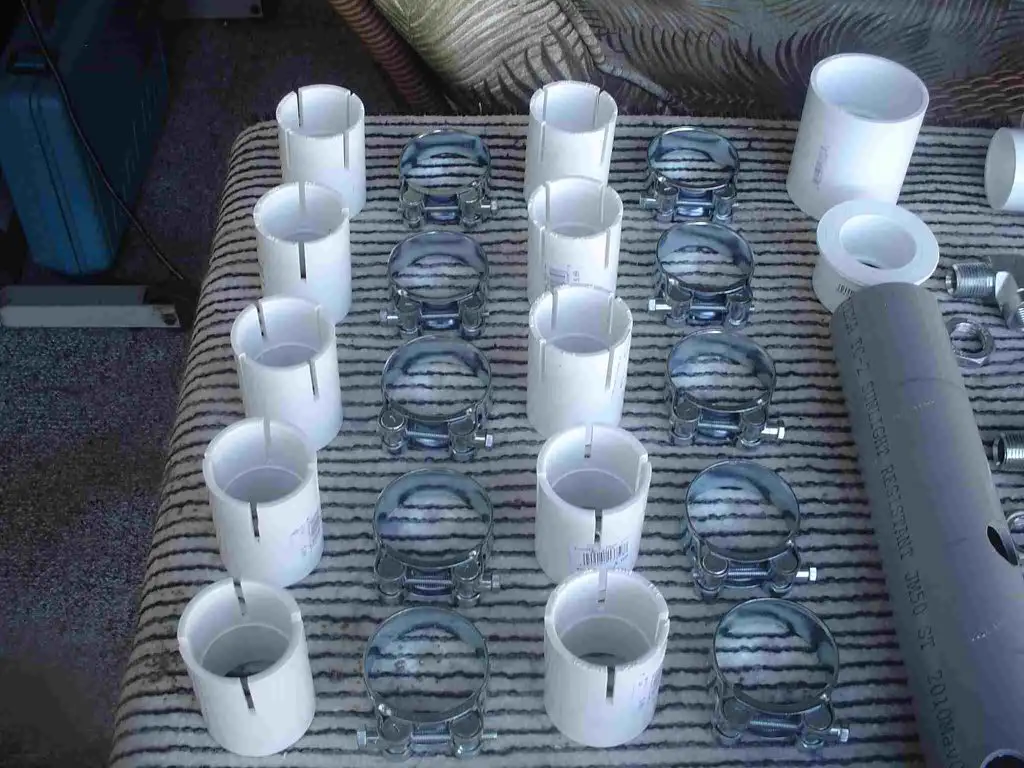

As you can see the quality of Lee’s kit appears to be extremely high.

Lee said he had a very talented helper in preparing the kit…
Contact Lee directly if you are interested in his kit. He can be reached at bluewaterenterprises@Safe-mail.net
Editor’s Note: Sadly, Lee is no longer responding. I left the pictures and description in because I was impressed with his design and I hoped it might help others wanting to copy his technique.
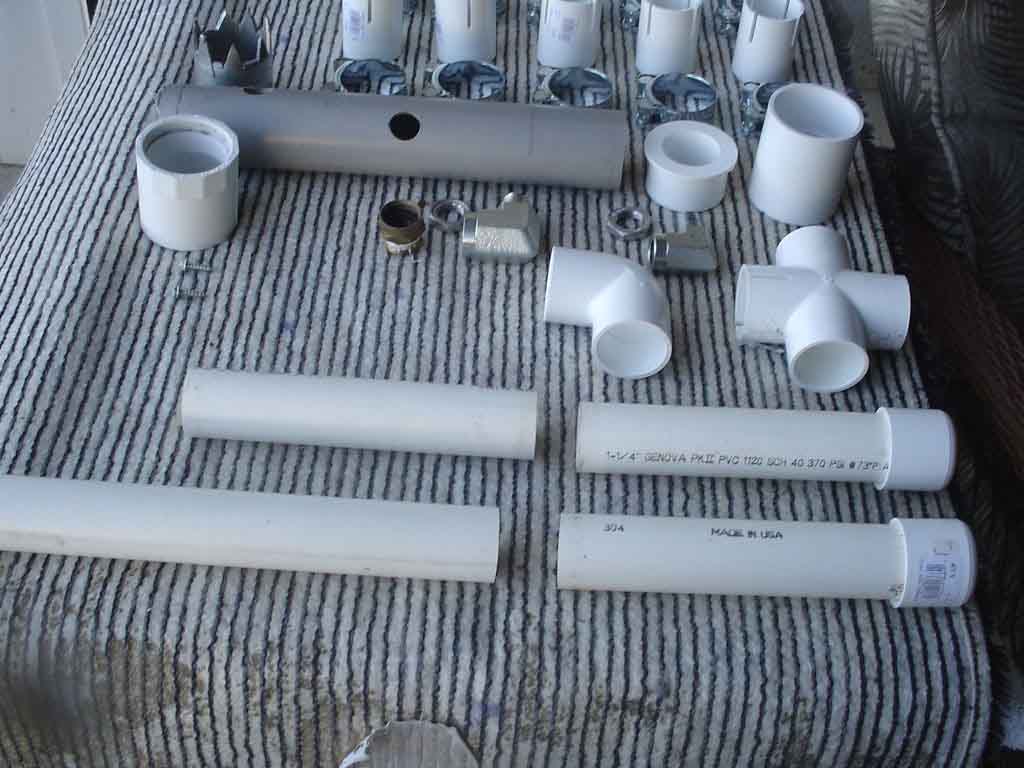
Lee provided the following parts list and information:
Parts list
10 T bolt clamps +9 in box one on the handle tee
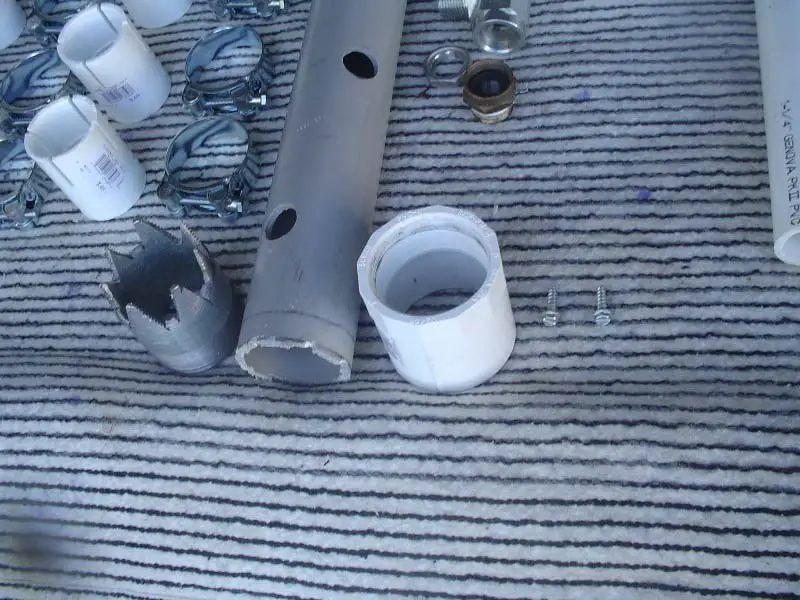
1 2 inch x 3 inch galvanized nipple with cut teeth for drill bit
1 metal screw for nipple set stop
1 special stainless steel 90 1/2 x 3/4 hose thread to npt (for water hookup)
1 special stainless steel 90 1/2×1/2 for air hose ( you may need one quarter bushing for hose )
2 1/2 inch stainless steel nuts
1 3/4 hose adapter 3/4 npt male to female hose thread ( Not included )
1 2 inch PVC conduit pipe 13 1/2 inches long for drill body
First hole up from end two and three quarters inches center.
Offset around pipe from first hole one and three quarters and up seven and three quarters inches center.
3 1×1/4 PVC pipe 8 inches long for handle assembly and riser
1 1×1/4 cross 4 x 1 inch inch slots cut in one opening for clamp
1 1×1/4 PVC pipe 11 inches water discharge
2 1/1/4 caps for handle
1 1×1/4 PVC 90 for handle discharge
1 2 inch PVC female adapter slip to npt thread
1 2 inch PVC coupler for bushing slip slip
1 2 inch x 1 1/4 bushing slip slip
10 1×1/4 inch coupler 4 slots 1 inch cut in one opening for clamps
All PVC is schedule 40
rolls of plastic electrical tape ( Not included )
rolls of duct tape ( Not included )
100 feet soft air and water hose ( Not included )
20 gallon tank minimum air compressor ( Not included )
Air control valve ( Not Included ) Harbor Freight $5.00!!
1 3/4 garden hose to npt adapter ( not included )
You may need a 1/2×1/4 reducing bushing for air hose ( Not included )
Various lengths 1 1/4 PVC at least 10 ( Not included )
Instructions
The first thing is dig a pilot hole with post digger or auger at least three to five feet deep. You need a work starter casing I like at least five feet long to keep drill hole straight. Casing can be four or six inch id your choice if in soft sand drill inside lengths of permanent casing going down.
Use casing with bell adapters bell bottom up this will keep casing smooth going down. Well hog for the most part is fully assembled. You need to glue the points indicated by matching letters due to shipping.
Fasten your air and water lines to the head ” FIRST.”
Glue in your first ten foot 1×1/4 PVC pipe and where it meets the 2 inch bushing duct tape, lines very very securely!
On the same pipe glue your first 1×1/4 coupler with clamp.
Electrical tape the lines together at about one or two foot spacing for 50 or 60 feet to start.
Now glue your couplers with clamps on ” ONE END ONLY “of 1x1x4 pipes!
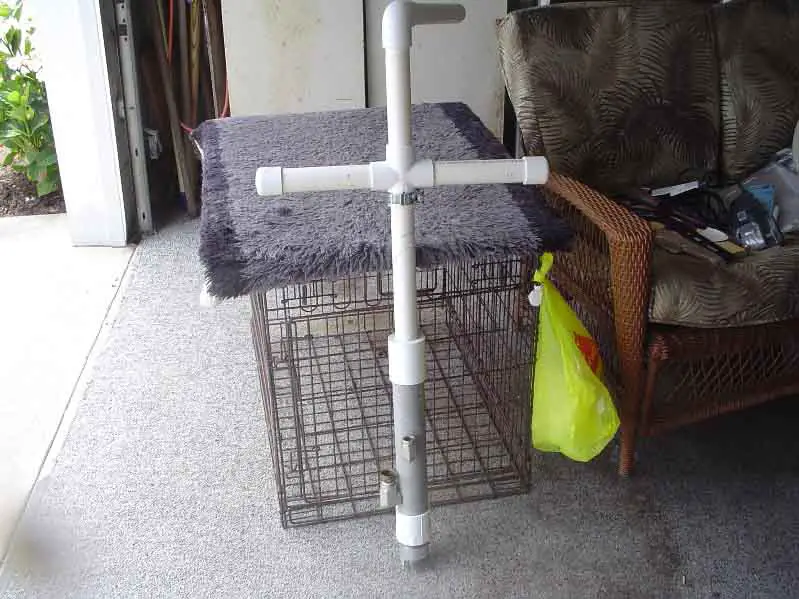
Place handle and spout on pipe and drill away place a clamp om handle tee !
As you add pipe going down always duct tape just above and below each coupling keeping the hose tight against the pipe as much as possible this will insure you can pull it up if any failure should occur.
You may wish to invest in large jaw vice grip pliers to hold pipe up while working.
DO NOT LEAVE DRILL IN WELL UNATTENDED. If you have to stop drilling pull up about ten feet and clamp off, then sand will not stick your drill pipe.
Be sure each pipe you add is fully seated in coupler to prevent leaks before the clamp is secured! Adjust air just enough to push water and material out spout.
Drill back and forth and stop when you see mud and dirt. Let it clear then begin again!!! The goal is a good water and dirt slush in hole then apply some air to push! Water volume is the key the more GPM the better! ( A water line boost pump helps )
You may also wish to make a five foot change pipe if you do not have a tall ladder! (Five feet down pull up clamp off and remove five foot add ten foot and resume).
Well hog is designed to go down inside a four inch casing you may use six if you like!!
Optional “Screen Hog”
Designed for four inch casing and two inch well points for screens!! It is available for sale. However, I will be glad to advise how to build and use!!! ( Shipping is out of sight )
I am happy to give reasonable support just email and I will call!
Remember, I said reasonable !
“Remember ” its called a “hog ” because it is not pretty, just functional!
Lastly, a good dog and a case of beer will get you through the day. ( Not included )
Thank You,
Lee Price
The dog ( Nemo ), also thanks you, as he buys the beer!!!